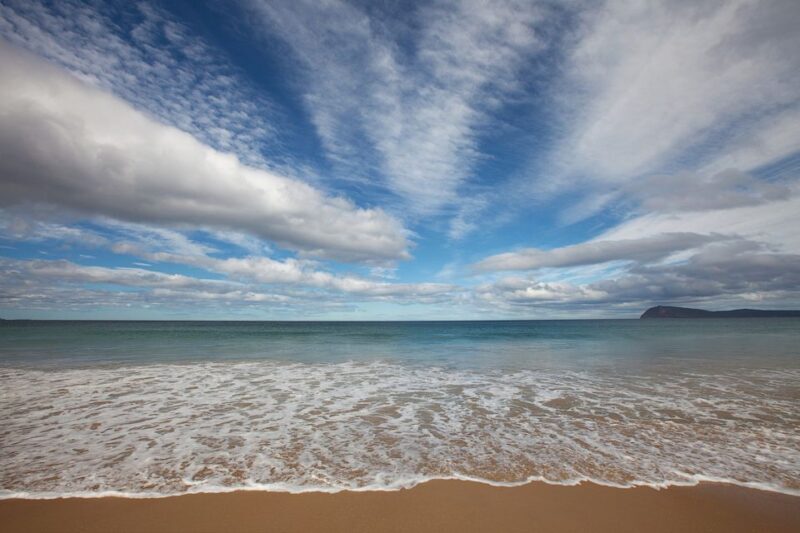
Hobart: Day Trip to Mt Wellington and MONA with Ferry Ride — A Full Day of Scenic Wonder and Artistic Discovery
If you’re visiting Tasmania’s capital and craving a perfect blend of natural beauty and cutting-edge art, this guided day trip from Hobart checks all the boxes. For around $87 per person, you get a 7.5-hour journey through Tasmania’s iconic landscapes, topped with a visit to the world-famous Museum of Old and New Art (MONA), and a leisurely ferry ride along the Derwent River.
Your guide, often mentioned as knowledgeable and friendly, leads you through the highlights, making sure you get the most out of your day.
What we particularly love about this tour is how it balances breathtaking mountain vistas with thought-provoking contemporary art.
The drive up Mt Wellington offers sweeping panoramic views of Hobart and beyond, especially on a clear day, while the visit to MONA provides a deep dive into Tasmania’s vibrant arts scene, both old and new. Plus, the ferry cruise adds a relaxing, scenic element, letting you see the city and MONA from the water.
A potential consideration? The weather can be unpredictable, especially on Mt Wellington, so a warm layer is advisable. Also, while the tour covers a lot, some visitors might find the schedule a bit tight if you want to linger longer at each stop.
Nevertheless, this tour is well-suited for those who appreciate a mix of scenic landscapes, cultural insights, and stunning architecture — ideal for first-timers or anyone wanting a comprehensive taste of Hobart’s highlights.
- Key Points
- A Detailed Look at the Experience
- Starting Point and Transportation
- The Drive to Mt Wellington
- The Summit Walk and Local Landmarks
- The Scenic Ferry Ride to MONA
- Visiting MONA
- Dining and Free Time at MONA
- Return Cruise and End of the Day
- Why This Tour Works for Travelers
- Frequently Asked Questions
- Final Thoughts
- The Best Of Hobart!
- More 1-Day Tours in Hobart
- More Tour Reviews in Hobart
Key Points
- Stunning Views: Panoramic vistas from Mt Wellington’s summit give you a true sense of Tasmania’s rugged beauty.
- Art and Culture: MONA’s eclectic exhibits challenge perceptions and spark conversations, all accessible via a handy touchscreen guide.
- Scenic Ferry Ride: Cruising along the Derwent River offers a relaxed way to see the city and MONA from a different perspective.
- Historical Sites: Including Cascade Gardens and the Female Factory, the tour provides insight into Hobart’s colonial past.
- Guided Experience: Knowledgeable guides help interpret sights, making the journey more meaningful.
- Value for Money: With transportation, entrance fees, and a ferry ride included, it’s a comprehensive day for a reasonable price.
👉 See our pick of the 15 Top-Rated Hobart Wine Tours
A Detailed Look at the Experience
You can also read our reviews of more tours and experiences in Hobart

Starting Point and Transportation
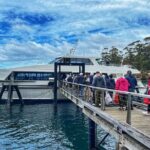
The tour begins at the Brooke Street Pier in Hobart, a convenient spot for travelers staying near the waterfront. The transport is a comfortable mini bus, which many reviews praise for its ease and the friendly, professional drivers like Allan or Colin. We found that the transportation aspect significantly adds to the experience — it removes the hassle of planning routes and parking, allowing us to relax and focus on the scenery and stories.
The Drive to Mt Wellington
The journey to Mt Wellington is a highlight itself. As you ascend, the landscape shifts dramatically — from lush city suburbs to a stark, rocky alpine environment. The road winds through impressive rock formations like the Organ Pipes, which are striking and give a sense of the mountain’s ancient, volcanic origins. The switchbacks and rugged terrain remind you that you’re entering a different world.
At the summit, you get a 360-degree view of Hobart, the surrounding waterways, and distant mountains. On a clear day, this is an unmissable vista. However, some reviews note that weather can be quite windy, and visibility might be limited if clouds roll in. Still, even a quick stop provides enough opportunity for photos and admiring nature’s grandeur.
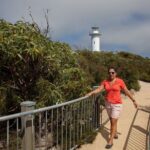
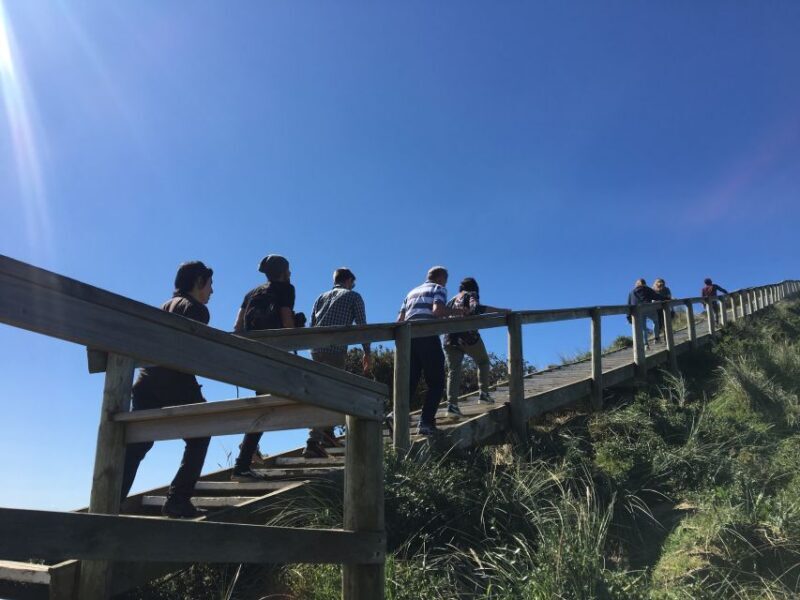
The Summit Walk and Local Landmarks
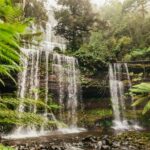
A short, guided walk at the top leads you to the observatory, offering a chance to breathe in the crisp mountain air. The drive back down takes you past Cascade Gardens, a peaceful spot to stroll and enjoy the landscaped greenery. From here, the tour stops at the Cascade Brewery, Australia’s oldest operating brewery, where you can snap photos of the historic buildings and the nearby Female Factory, a former prison site that tells stories of Tasmania’s convict past.
Some guests comment that the stop at the spring on Mt Wellington wasn’t necessary if they already had good views earlier. They suggest adding more time at the brewery, which is a great idea if you’re interested in local beverages and history.
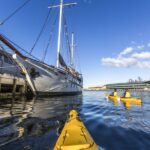
More Great Tours NearbyThe Scenic Ferry Ride to MONA
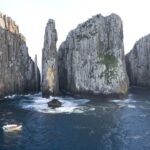
Back at Hobart’s waterfront, the tour transitions smoothly onto a ferry. The cruise along the Derwent River is relaxing and offers a different perspective of the city, the river, and the striking architecture of MONA. The ferry ride is well-reviewed; travelers appreciate how it offers a peaceful, scenic break from the busy day.


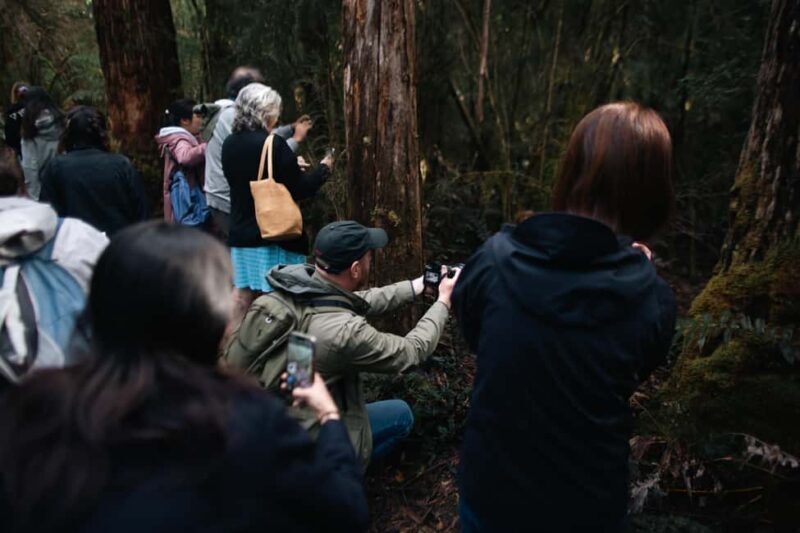
Visiting MONA
Once ashore, you step into MONA, a museum that’s as much about experience as it is about art. The exhibits range from ancient artifacts to modern and contemporary works, often provocative and definitely conversation-starting. You’re given a handheld touchscreen device, called “The O,” which helps you learn about the pieces, listen to artist interviews, and navigate through the displays at your own pace.
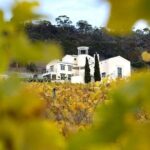
Reviewers mention that MONA’s architecture itself is worth the visit — the building seems almost otherworldly, with its underground galleries, quirky corridors, and clever lighting. The museum can be overwhelming in a good way, and many appreciate the value of the guided audio, which adds context and depth.
Dining and Free Time at MONA
For lunch or a snack, options include the Source Restaurant, Museum Cafe, or the Wine Bar. Prices are at your own expense but many find them reasonable considering the quality and setting. Some reviews highlight how the on-site food complements a day of exploration — a nice way to relax before heading back.
Return Cruise and End of the Day
After a leisurely visit, you board the ferry again for the cruise back to Hobart, often described as a peaceful way to reflect on the day’s sights. The tour concludes at the same point where it started, leaving you with a full day’s worth of stunning landscapes, intriguing art, and scenic relaxation.
Why This Tour Works for Travelers
This tour offers a balanced mix of scenic drives, cultural experiences, and water-based sightseeing. It’s especially suited for those who prefer an organized, hassle-free day where logistics are taken care of, allowing you to focus on the sights and stories. The inclusion of guided commentary ensures you get a richer understanding of the places visited — from the volcanic origins of Mt Wellington to MONA’s groundbreaking art.
It’s particularly praised by guests who value knowledgeable guides and good value for money, especially considering the entrance fees, ferry rides, and transportation are included. If you’re curious about Tasmania’s natural beauty and contemporary culture, this tour will help you see both in one day.
Frequently Asked Questions
Is this tour suitable for people with mobility issues?
Yes, the tour is wheelchair accessible, making it feasible for guests with mobility needs to enjoy the highlights.
How long is the ferry ride?
The ferry ride itself isn’t specified in length, but it’s a scenic cruise along the Derwent River, providing a relaxing break and views of MONA’s architecture from the water.
What should I bring for this tour?
Comfortable shoes and warm clothing are recommended, especially for the mountain summit where it can be windy and chilly.
Is there enough time to explore MONA on my own?
Yes, you’ll have ample time to enjoy the exhibits at your own pace using the touchscreen guide, and to visit the on-site restaurant and cafes.
How does the tour handle weather variations?
The itinerary may vary due to weather and road conditions, especially on Mt Wellington. Guides typically adjust for safety and visibility, so flexibility is key.
What makes this tour a good value?
With transportation, entrance to MONA, and a ferry cruise all included, it offers an efficient way to experience Hobart’s top sights without extra planning or additional costs.
Can I cancel if my plans change?
Yes, the tour offers free cancellation up to 24 hours in advance, providing peace of mind if your schedule shifts.
Hobart: Day Trip to Mt Wellington and MONA with Ferry Ride
Final Thoughts
This Hobart day trip offers a well-rounded snapshot of Tasmania’s natural and cultural treasures. You’ll enjoy spectacular mountain views that evoke a sense of wilderness, and then switch gears to explore MONA’s provocative art collection, all with the convenience of guided transport and commentary. The ferry ride adds a peaceful element, giving you a different perspective on Hobart’s waterways and architecture.
It’s an excellent choice for travelers who want to see a lot without the hassle of planning, and who appreciate both scenic landscapes and contemporary art. Whether you’re a first-time visitor or looking to deepen your understanding of Tasmania, this tour provides value, variety, and authentic experiences that linger long after the day ends.
In sum, if you’re after a day that combines Tasmania’s raw beauty with its innovative art scene, and want to do so comfortably and affordably, this trip delivers. It’s especially appreciated by those who enjoy guided insights and seamless logistics, making your exploration both enriching and stress-free.
You can check availability for your dates here: