
The first mistake almost everyone makes shows up an hour into their day on the ice: cotton hoodie under a normal ski jacket, jeans, regular winter boots. Twenty minutes of swinging tools and front-pointing later, the sweat soaks through the cotton, the jeans freeze stiff against your shins, and you can’t feel your toes inside boots that were never built to take a crampon. Ice climbing in Abisko is not casual-winter-warm, and the Abiskojokk canyon does not care that you packed for a Christmas market.
This is a guide to booking the right tour for the conditions and arriving with the right kit so you actually enjoy the day instead of surviving it.
Best small-group feel: Ice Climbing Experience with Certified Guide, $126. Same length, hotel pickup in Abisko, slightly different operator with a strong patient-belay reputation.
- What ice climbing in Abisko actually means
- Why people get the season wrong
- The three tours worth booking
- 1. Abisko Ice Climbing for All Levels with Certified Guide: 1
- 2. Ice Climbing Experience with Certified Guide: 6
- What you actually wear (and what you regret)
- Pickup, transport and logistics
- Getting to Abisko in the first place
- What to do with the rest of your day
- How fit do you need to be?
- What the canyon looks like under all the ice
- Why people choose Abisko over other ice-climbing destinations
- The brief history of climbing this canyon
- Common mistakes to skip
- The view from the top of route one
- Other Abisko and Lapland tours worth knowing about
What ice climbing in Abisko actually means

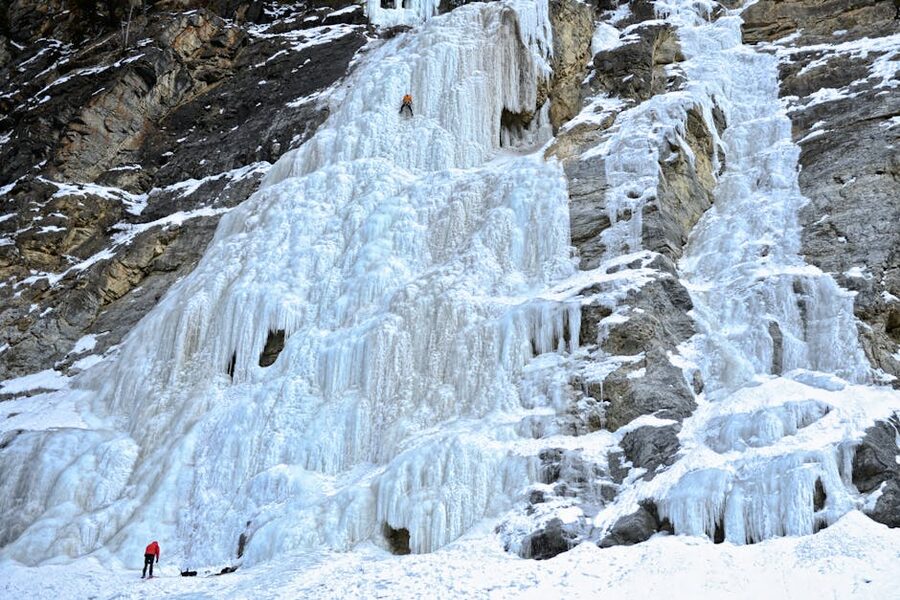
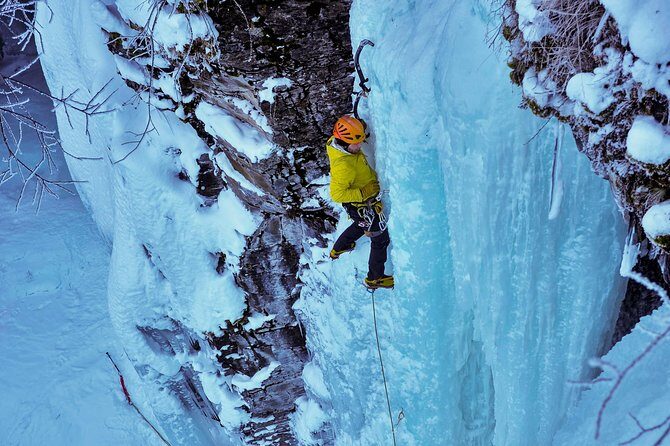
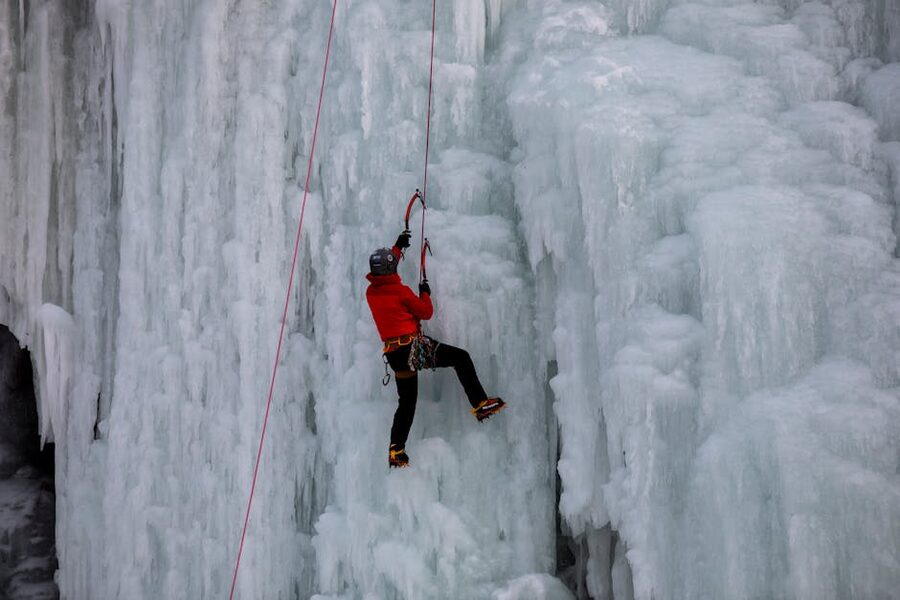
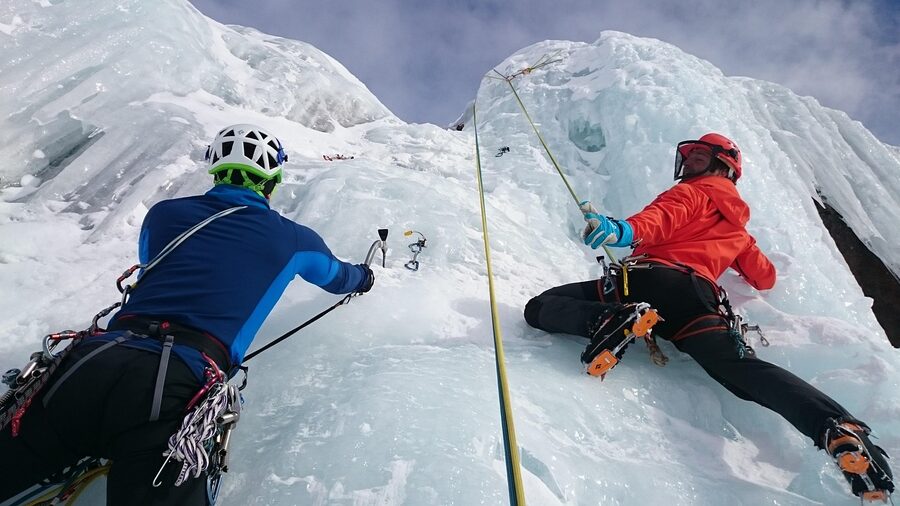
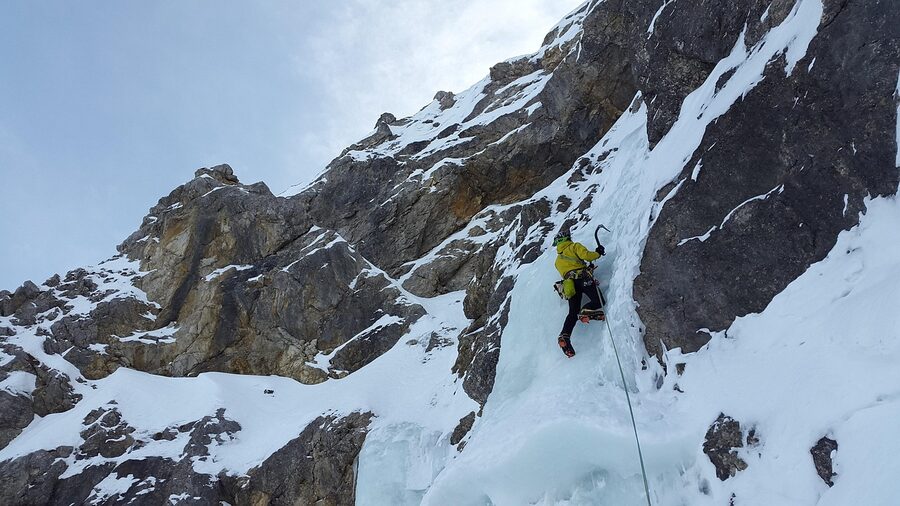
Forget the mental image of a Himalayan expedition. Abisko ice climbing is mostly short, vertical-or-near-vertical pitches on frozen waterfalls, with the rope already set from the top by your guide. You clip in, swing your axes into the ice, kick your front-points, and work your way up. Down at the bottom, the guide belays. Fall off and you swing two centimetres before the rope catches you.
That format has a name: top-rope climbing. It’s how every beginner tour in the area is run, and it’s the safest way to learn. The cliff might be twelve metres or it might be twenty-five, but you’re never lead climbing, never placing your own ice screws, never doing anything that would scare a sensible person. The only thing between you and a comfortable belay is your own willingness to commit to the next swing.
What separates Abisko from other ice-climbing spots is volume. The canyon has a lot of small-to-medium falls clustered together, which means the operator can pick a wall that matches the day’s group. A nervous first-timer gets a 12 m route. A returning climber asking for “something steeper” gets walked five minutes further along the rim and put on something with more bite. The same canyon can run beginners and intermediates side by side without anyone feeling out of their league.
Why people get the season wrong
The advertised window is roughly late November to mid-April. That’s accurate, but it papers over real differences in what the ice is doing.
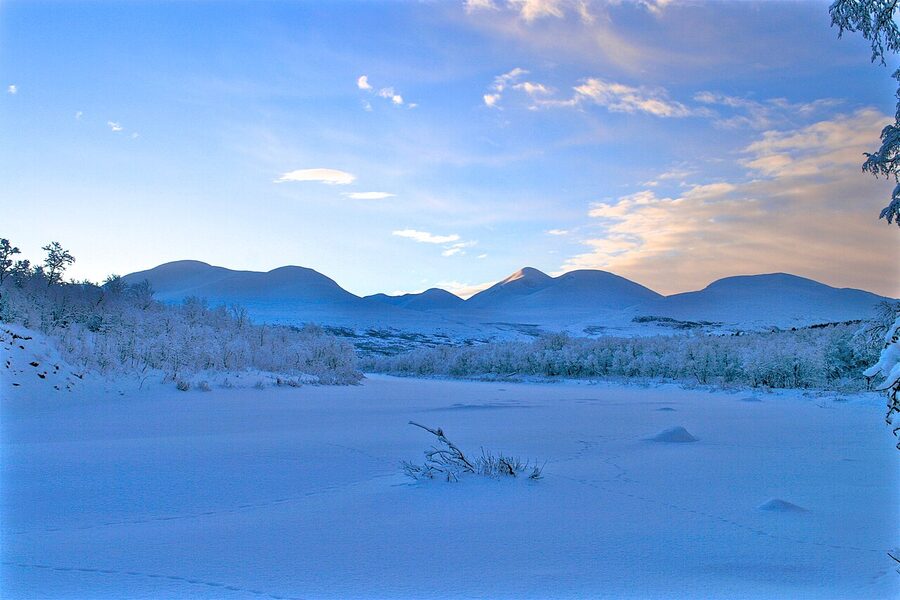
Late November and early December: the falls are forming. Some routes are climbable, others are still hollow or thin. Operators are picky about which walls they take you to. Cold, short days, magical light.
January and February: peak conditions. The ice is fully formed, the cold is deep enough to keep it stable, every route is in. This is the booking sweet spot if you want the most variety and the most reliable day.
March: shoulder season but a popular one. The sun is back, you can climb in proper daylight, and the cold is still solid most days. Some weeks in March are better than January because you actually see what you’re doing.
Early April onwards: this is where late-season climbing in Abisko becomes its own weather game. The midday sun is now strong enough to soften the ice surface. Routes that ran all winter start to thin and unsticking sections happen. Operators close routes one by one. By mid-April most of the canyon is shut. If you book in early April, accept that the guide will pick the day’s wall based on overnight temperatures, and that “we’re going somewhere different than originally planned” is a good sign, not a disappointing one.
The three tours worth booking
Two operators run the bulk of public ice-climbing tours from Abisko, and there’s broad overlap. Both use the same canyon, both supply the same gear, both are staffed by certified guides. Practically: book whichever has space on your travel dates. If both are open, the differences below are small but real.
1. Abisko Ice Climbing for All Levels with Certified Guide: $121
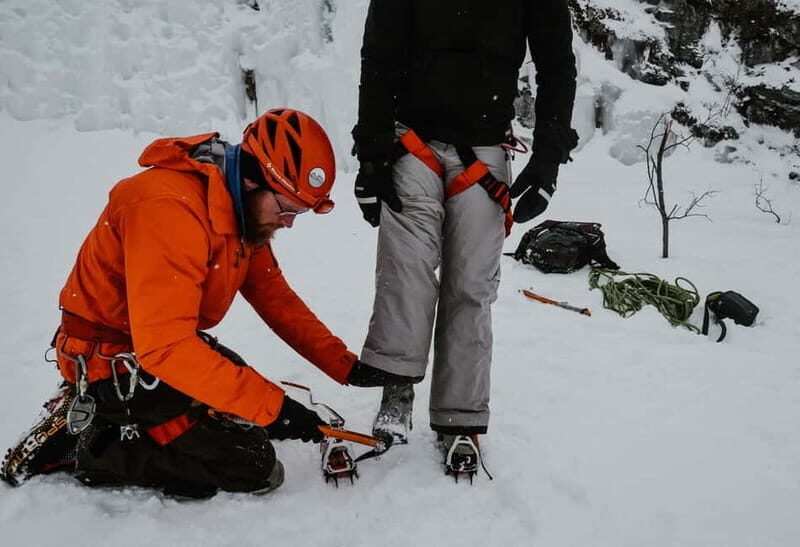
This is the one to book if you’re not sure which to pick. The format is simple: you meet at a pickup point in Abisko or Bjorkliden, get fitted with boots, crampons, harness, helmet, and a pair of ice tools, then drive five to ten minutes to the canyon. The guides rotate routes through the day so you usually get a mix of two or three different walls. Our full review covers the gear-fit process and what the day looks like minute by minute.
Check Availability
Read our full review
2. Ice Climbing Experience with Certified Guide: $126
Almost identical product, slightly different operator. The standout reputation here is patient belaying and clear instruction; nervous first-timers tend to come off this one feeling braver than they expected. Our review walks through the booking flow and what’s actually included. Pickup is from your Abisko hotel, which beats finding a meeting point in the dark.
Check Availability
Read our full review
If you’re spending a few days in Abisko, both tours fit cleanly into a week of activity. Most people pair ice climbing with an Abisko aurora chase in the evenings; the days are short enough that you can climb at 09:30, finish by 13:00, eat, sleep, and be ready for the chase van at 21:00.
What you actually wear (and what you regret)
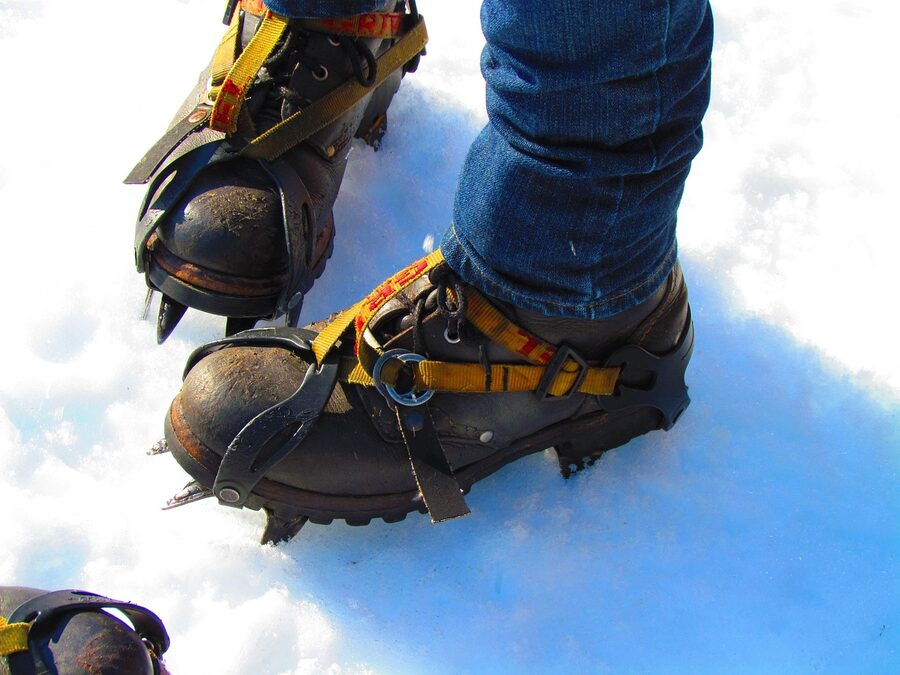
The boots, crampons, harness, helmet, and ice tools are all included. What you bring is the layering system underneath. Get this wrong and the day gets miserable. Get it right and you’ll forget you’re outside in minus fifteen.
Base layer: merino wool, top and bottom. Not cotton. Not under any circumstances cotton. Cotton holds sweat against your skin and freezes; merino wicks it away even when wet. A thin merino base is the single most important piece of kit you’ll bring.
Mid layer: a thick fleece or a thin synthetic puffy. Something that traps warm air without being bulky. You’ll be moving hard so you don’t need to dress as if you’ll be standing still.
Outer layer: a proper waterproof shell, top and bottom. Salopettes or hardshell trousers over the merino base, hardshell jacket up top. The reason you need waterproof trousers is that you’ll be kneeling, sitting, and front-pointing into wet ice for three hours; soft-shell pants soak through and freeze. A regular ski jacket and ski pants combo works fine if it’s properly waterproof; if you’re using cheap “winter pants” that aren’t sealed at the seams, expect to be cold.
Hands: this is where most people get it wrong. You want a thin glove for swinging the tools (so you can feel the grip and the trigger) and a thick mitten for the standing-around moments between climbs. Bring both. The thin glove on its own freezes your fingers in five minutes the moment you stop moving. Mittens too thick for the tools mean you can’t grip properly and you fall off the rope.
Head: warm hat under the helmet. No tassels, no pom-poms. The helmet sits flat and a tassel just lifts the back off your skull and lets cold air down your neck. A buff or thin neck gaiter is good extra insurance.
Optional but smart: a small backpack with a hot drink in a thermos, a chocolate bar or two, a spare pair of socks, and a power bank. Phone batteries die fast in the cold. The thermos is the unsung hero of any winter day in Lapland; cold hands wrapped around hot tea between climbs is the difference between enjoying yourself and clock-watching.
Pickup, transport and logistics
Most operators run two slots a day in peak season: a 09:30 morning tour and a 14:00 afternoon tour. Both are roughly three hours door to door, which leaves the rest of the day open for everything else Abisko does well.
Pickup happens at your accommodation if you’re staying in Abisko village or Bjorkliden. If you’re up at one of the lodges along the lake, confirm with the operator at booking that they cover that pickup point. The drive to the canyon is short, less than ten minutes, but the operator’s vehicle is the only realistic way in: you’re walking onto a snow-packed forest road off the E10, then a short hike in to the climbing area.
Last-minute bookings are accepted by some operators up to two hours before start time, conditions allowing. That’s worth knowing if your flight to Kiruna gets delayed or you change plans on arrival. It’s not a guarantee; in peak weeks both tours sell out a few days ahead, particularly the morning slots.
Getting to Abisko in the first place
You have two routes in. Fly to Kiruna and drive (or take the bus) the 100 km west on the E10 to Abisko, about 90 minutes in good winter conditions. Or take the night train from Stockholm direct to Abisko Turiststation, which is a 17-hour ride with a sleeper berth and is one of the great train journeys of Europe if you don’t mind the time.
Most ice climbers fly to Kiruna because it gets you on the ice the next morning. The night train is a richer experience but eats two days you could have spent in the canyon. If you’re combining ice climbing with northern lights and have four nights to spare, the train is wonderful. If you have a long weekend, fly.
From Kiruna airport there’s a shuttle bus that connects to Abisko in winter; check the schedule before you fly because it’s once or twice a day, not on demand. A taxi from Kiruna to Abisko is expensive but available; budget several thousand kronor.
What to do with the rest of your day
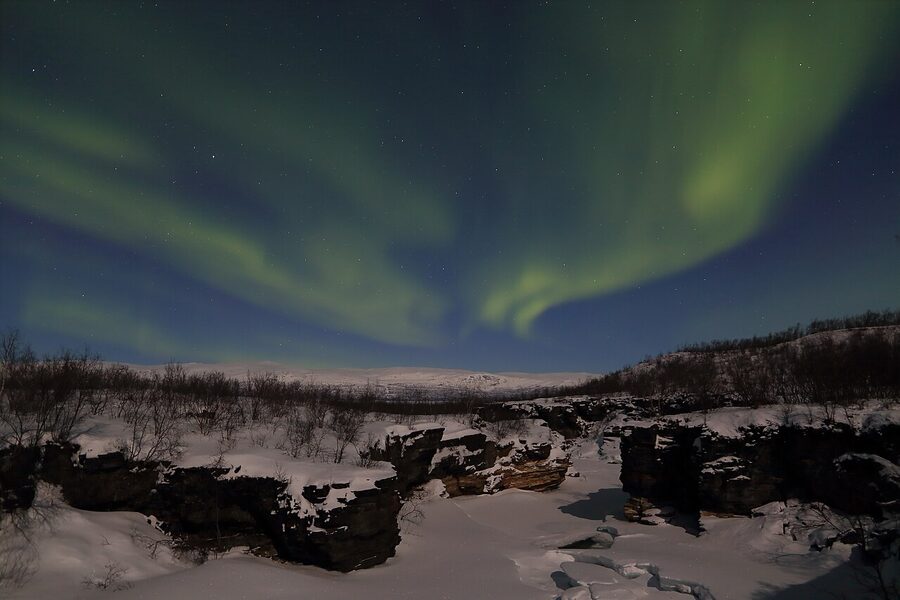
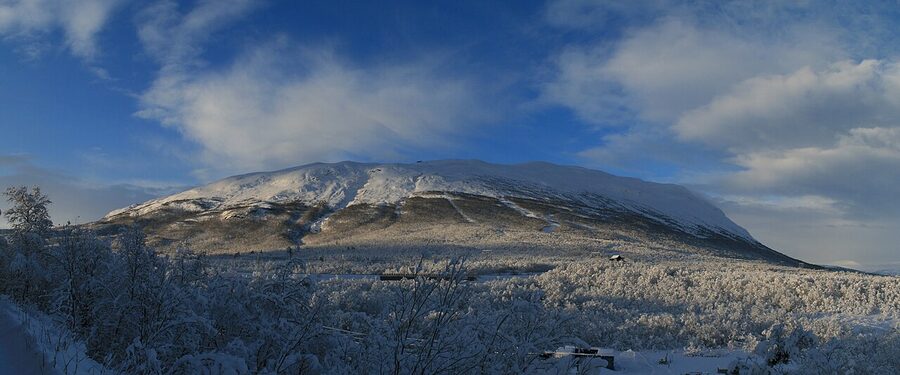
A morning ice climb leaves the afternoon and evening wide open. The natural pairing is an aurora hunt; book the aurora chase from Abisko for the same night and you’ll get back to the lodge near midnight tired in the best way. If your tour is the afternoon slot, do the morning lazily: late breakfast, a slow walk along the lakeshore, ride the Aurora Sky Station chairlift up Mount Nuolja for the view.
If you’re in for several days, build a Lapland day around different formats. A husky tour from Kiruna pairs well with an Abisko day; you ride the dogs out of Kiruna’s kennels then drive west to the canyon for ice the day after. The husky sledding from Kiruna is the obvious pairing if you have the time. A northern lights tour from Kiruna proper is the third format; while Kiruna NL tours are usually photographer-led and sit-and-wait at known spots, Abisko’s chase format pivots to wherever the sky is clearest. Same goal, different odds. Our guide to booking a northern lights tour in Kiruna covers the photographer-led format in detail.
How fit do you need to be?
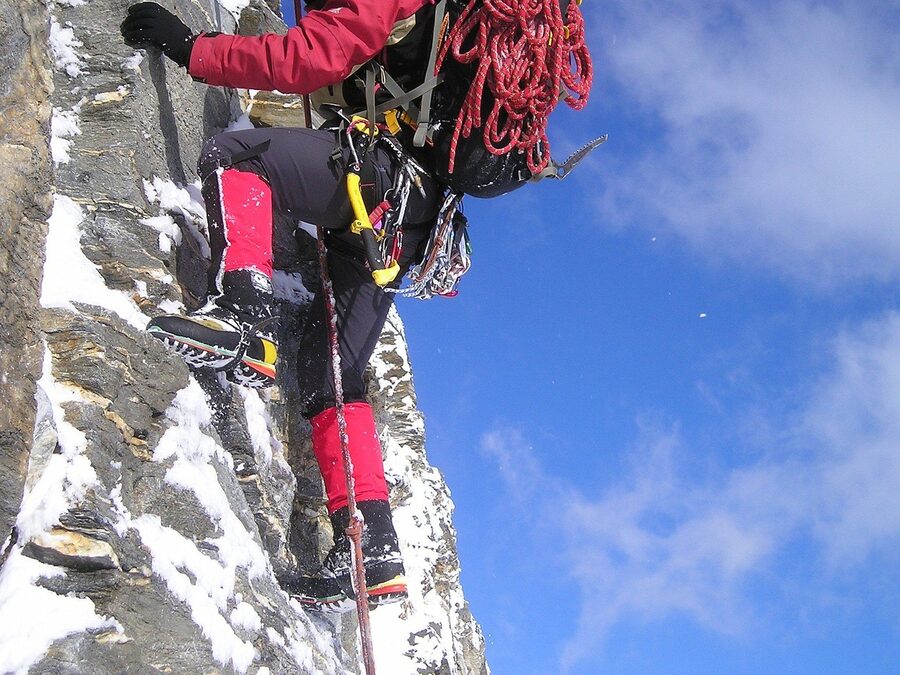
More than the operators tend to admit. The marketing line is “no experience needed, all fitness levels welcome”, and that’s true within limits. You don’t need to be a climber. You don’t need to lift weights. But three hours of swinging axes and front-pointing with the boots and crampons strapped on will leave you sore in places you didn’t know you had. Your forearms in particular will burn by the second route. Your calves will protest by the end of route one if you’re not used to standing on the front edge of your foot.
If you do any kind of regular activity, hiking, cycling, climbing in a gym, you’ll be fine and you’ll enjoy the day. If you genuinely never exercise, the climbing will still be possible but you’ll want to pace yourself, take rests between attempts, and not feel pressured to climb every route the guide sets up.
The age cutoff varies by operator but most run from 10 or 13 years old upwards, with kids 10 to 16 needing a paying adult on the rope with them. People with certain heart conditions, recent surgeries, or significant mobility issues should ring the operator before booking; the canyon approach involves walking on uneven snow and ice, which is harder than the climbing itself for some people.
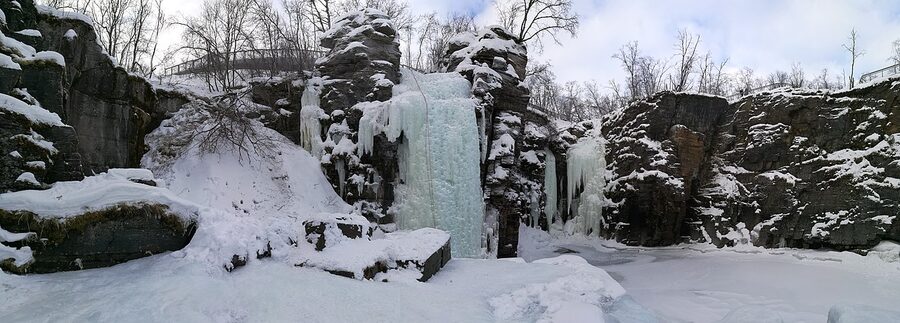
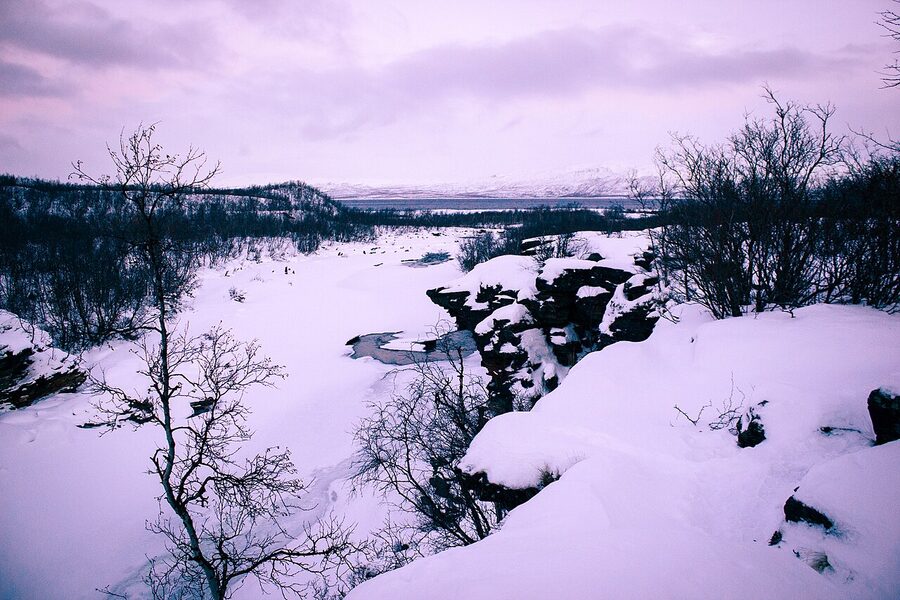
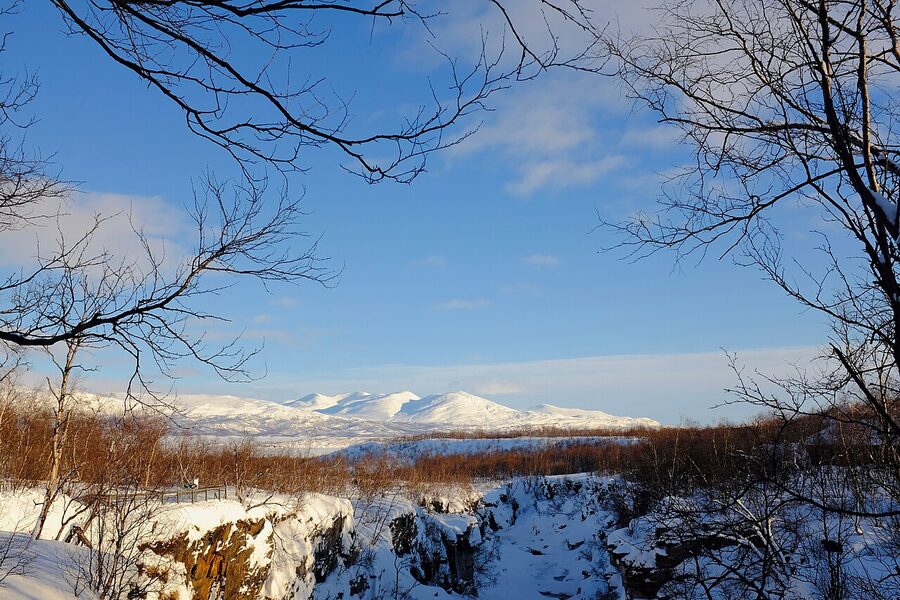
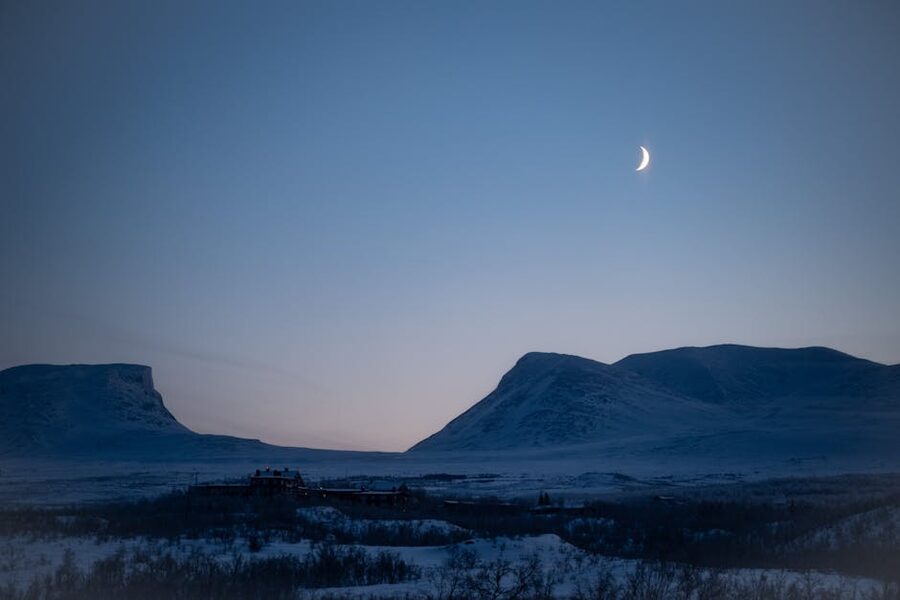
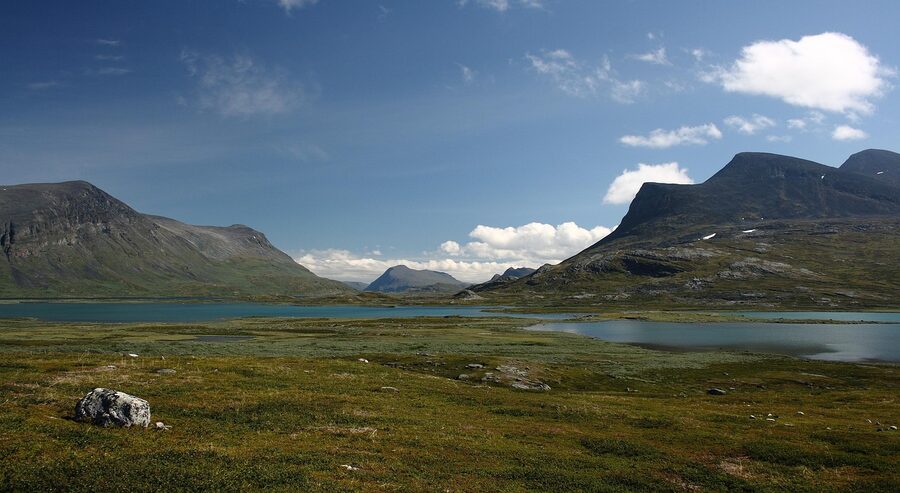
What the canyon looks like under all the ice
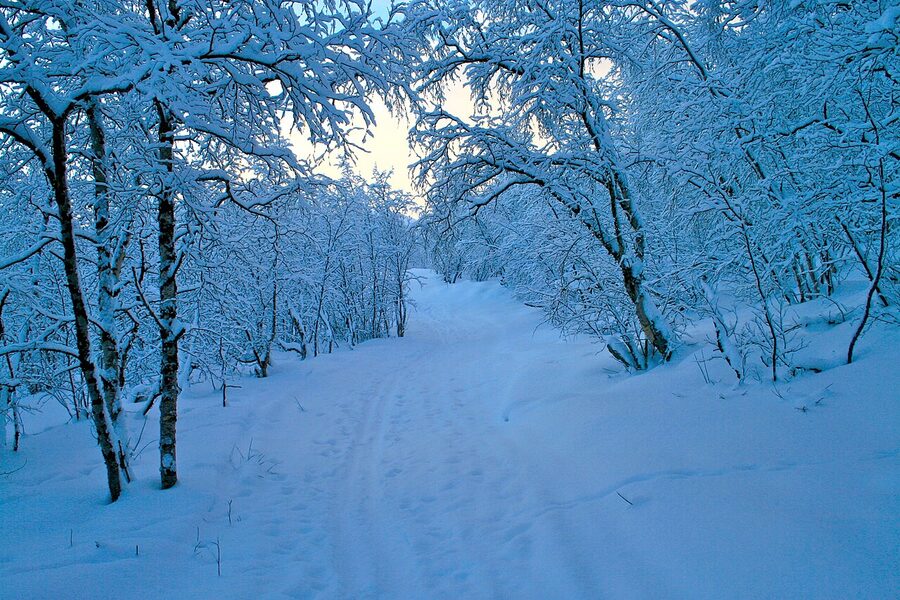
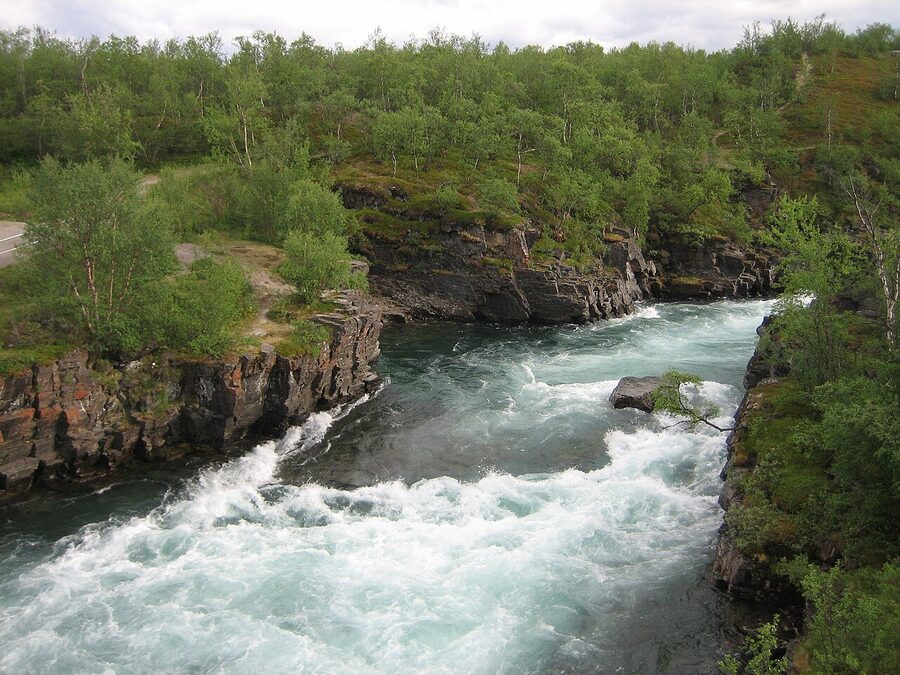
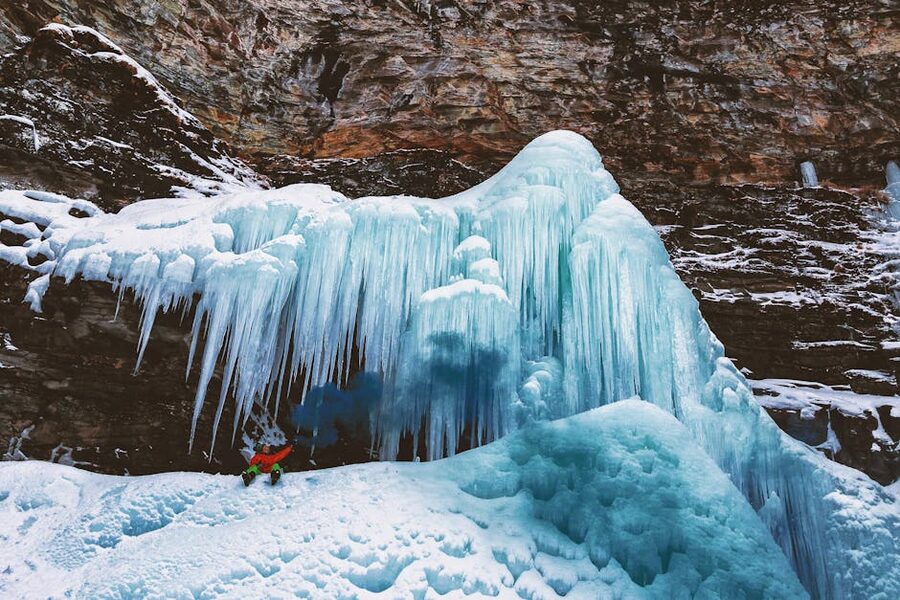
The Abiskojokk runs from Lake Tornetrask down to the Norwegian border, and over thousands of years it’s cut a sharp gorge through the bedrock. The gorge isn’t deep by Norwegian standards, maybe 20 to 30 metres at the climbing sections, but it has the right geometry for ice formation: vertical walls with seepage, north-facing aspects that hold the cold, and easy access from the road above. Side streams off the main canyon freeze into separate icefalls, which is why operators have so much choice of routes.
The famous icefall in the heart of the canyon is about 12 m high, considered the standard “introductory” route, and gets climbed by every beginner tour during the year. Other routes range up to roughly 50 m, which is where intermediate climbers head when they want a longer pitch. None of this is on the scale of Norwegian fjord climbing where 200 m and 700 m routes exist; the appeal of Abisko is the density of accessible, manageable ice in one walkable area, not the sheer size of any single climb.
.jpg)
Why people choose Abisko over other ice-climbing destinations
Three things, really. First: the access. The canyon is 100 km from a small commercial airport (Kiruna), connected by direct road, with a 10-minute final transfer to the climbing area. You can be in Stockholm at breakfast and on the ice the next morning. Compare that to driving deep into the Norwegian fjords or flying to Iceland and adding a multi-hour drive.
Second: the density. Within a 200-metre stretch of canyon you have routes from 12 m beginner pitches to 50 m intermediate climbs, plus separate icefalls fed by side streams. A guide can rotate three or four different walls in a single afternoon to match the group.
Third: the package. Abisko is a place that does winter well across the board. You can ice climb in the morning, ride the chairlift in the afternoon, chase auroras at night, and try a husky run the next day, all from the same lodge. Other ice-climbing destinations make you choose: Chamonix is great climbing but everything else is alpine summer. Iceland is glacier-focused. Abisko gives you ice climbing as one option in a full Lapland menu.
The brief history of climbing this canyon
Ice climbing as a recognised sport developed in the European Alps in the 1970s, with the introduction of the modern curved-pick ice tool. Before that, climbers used straight-pick axes designed for cutting steps and weren’t really climbing vertical ice the way it’s done now. The technique you’ll learn on your tour, swing the tool, kick the front-points, weight transfer, is itself only about fifty years old.
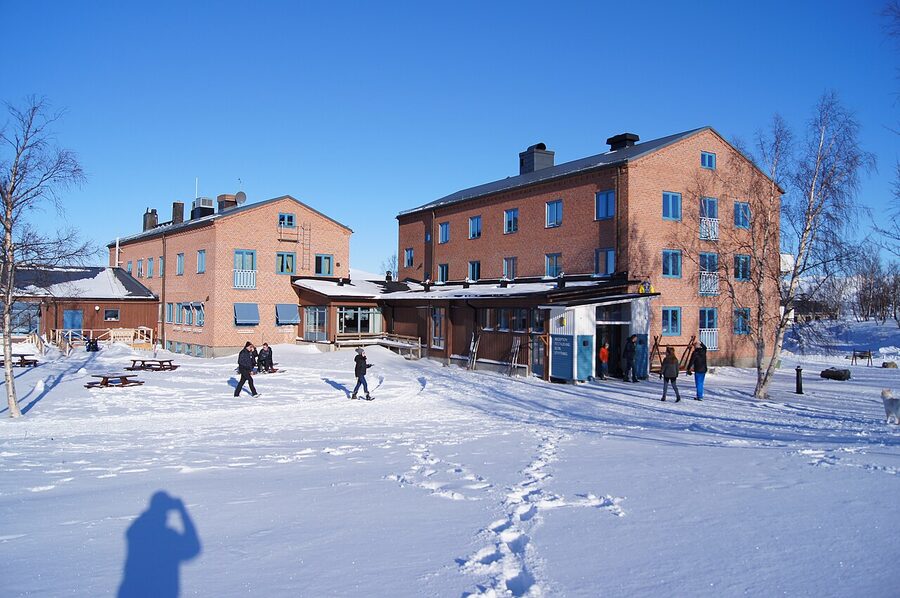
Abisko entered the picture as a guided ice-climbing destination in the 1990s and 2000s, when the existing summer mountaineering and hiking infrastructure pivoted to year-round operation. The canyon was a known summer feature, the railway and the Turiststation were already there, and the addition of trained ice guides turned a winter quiet season into a peak season.
Today the area runs as a mix of public group tours like the ones above, private guided days for stronger climbers, and multi-day camps for people who want to develop their own skills toward leading. If you fall in love with it on your first tour, the multi-day options are how you progress. Most people stop at the introductory tour and that’s perfectly fine; one day in the canyon is a complete experience.
Common mistakes to skip
Booking too late in the season hoping for sun. Mid-March is good. Mid-April is rolling the dice. Operators won’t take you out on questionable ice but they will refund or reschedule rather than risk it, which is great for safety and frustrating for trip planning.
Underdressing because the booking page says “all gear included.” All gear includes the climbing kit. It does not include base layers, mid layers, or the right gloves. Re-read the wear-this section above.
Booking the afternoon slot when you’ve already done a heavy morning. Three hours of ice work after a morning aurora chase the night before and a husky run that morning is too much. If you’re stacking activities, do the ice climb first, when you’re fresh.
Treating it as a photo opportunity. You can’t climb with a camera in your hand, you can’t take selfies on the rope, and you’ll regret giving the guide your phone to film with because the guide is busy belaying. Bring a phone for the before-and-after shots, leave it in your jacket while you climb.
Booking a beginner tour and expecting to feel like an expert by the end. You won’t. Three hours is enough to get a real taste of vertical ice and to leave you wanting more. It’s not enough to make you ready for a multi-pitch route or independent climbing. Adjust expectations accordingly and you’ll have a great day.
The view from the top of route one
The first time you reach the top anchor on a vertical ice route, you turn around and the canyon opens up below: white walls, the frozen river bed, the silence of cold air against your face, the rope feeding back down to your guide. It’s the moment that justifies the boots and the cold and the early start. A lot of people book ice climbing thinking they’ll do it once for the bucket list and end up booking a second day before they fly home.
If that’s you, talk to your guide about the next-step options. Most operators run private days and skill-development sessions for people who want to push past the intro tour. Pricing is higher and the format is one-on-one or two-to-one with the guide rather than a group, but the quality of instruction is excellent.
Other Abisko and Lapland tours worth knowing about
Abisko works best as part of a longer Lapland trip rather than a standalone day. The natural sister tour is the Abisko aurora chase, which runs at night and pairs perfectly with a morning climb. From Kiruna, the obvious pairings are husky sledding for a different format of cold-weather day, and a photographer-led northern lights tour from Kiruna if you’re flying in from the Kiruna side and want a sit-and-wait aurora night before driving west to Abisko. If you’re connecting through Stockholm with a day or two to spare, our Vasa Museum guide and the Stockholm archipelago piece both make good fillers between flights.
Affiliate disclosure: links to GetYourGuide and Viator may earn us a commission at no extra cost to you. Tour selection and opinions are our own.